The Fredkin Gate - Qiskit
In this blog post, you'll understand what the Fredkin gate does, and how to implement it using Qiskit.
Understanding the Fredkin Gate
The Fredkin gate, or the Controlled-SWAP(CSWAP) gate, is a reversible 3-bit gate. It has one control bit and two target bits. If the control bit is 1, it swaps the two target bits. If the control bit is 0, it leaves the target bits unchanged.
The Fredkin gate is used in:
- The Swap Test: Used to measure similarity between two quantum states.
- Error correction codes to swap quantum information between different qubits without measuring them.
Implementing the Fredkin Gate Using Qiskit
from qiskit import QuantumCircuit, transpile
from qiskit.visualization import plot_histogram

# A quantum circuit with 3 qubits and 3 classical bits
q = QuantumRegister(3,"qreg")
c = ClassicalRegister(3,"creg")
qc = QuantumCircuit(q,c)

# Function to add the Fredkin (CSWAP) gate to the circuit
def fredkin_gate(circuit, control_qubit, target_qubit1, target_qubit2):
    circuit.cx(control_qubit, target_qubit2)
	circuit.ccx(control_qubit,target_qubit_2,
			target_qubit_1)
    circuit.cx(control_qubit, target_qubit2)
Going Through an Example
Let's understand what's happening in each line of code by going through an example:
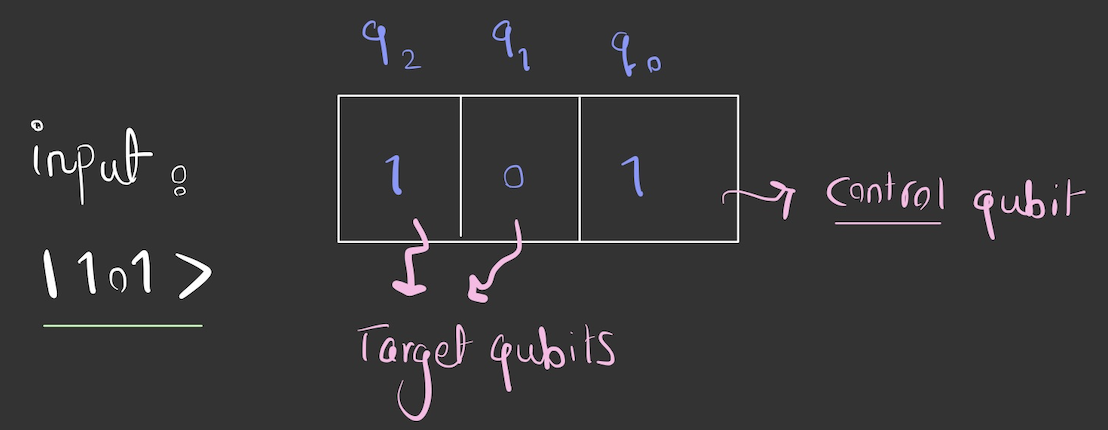
Input :
Control qubit:
Target qubits:
Go ahead and prepare your state in your code. Then, apply the fredkin_gate() function you created before:
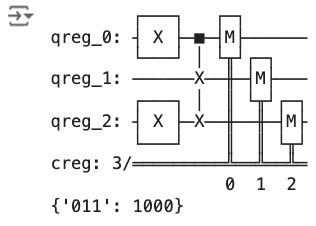
qc.x(0)  # Set qubit 0 to |1> (control qubit)
qc.x(2)  # Set qubit 2 to |1>

fredkin_gate(qc, 0, 1, 2)
What output do you anticipate from the Fredkin Gate?
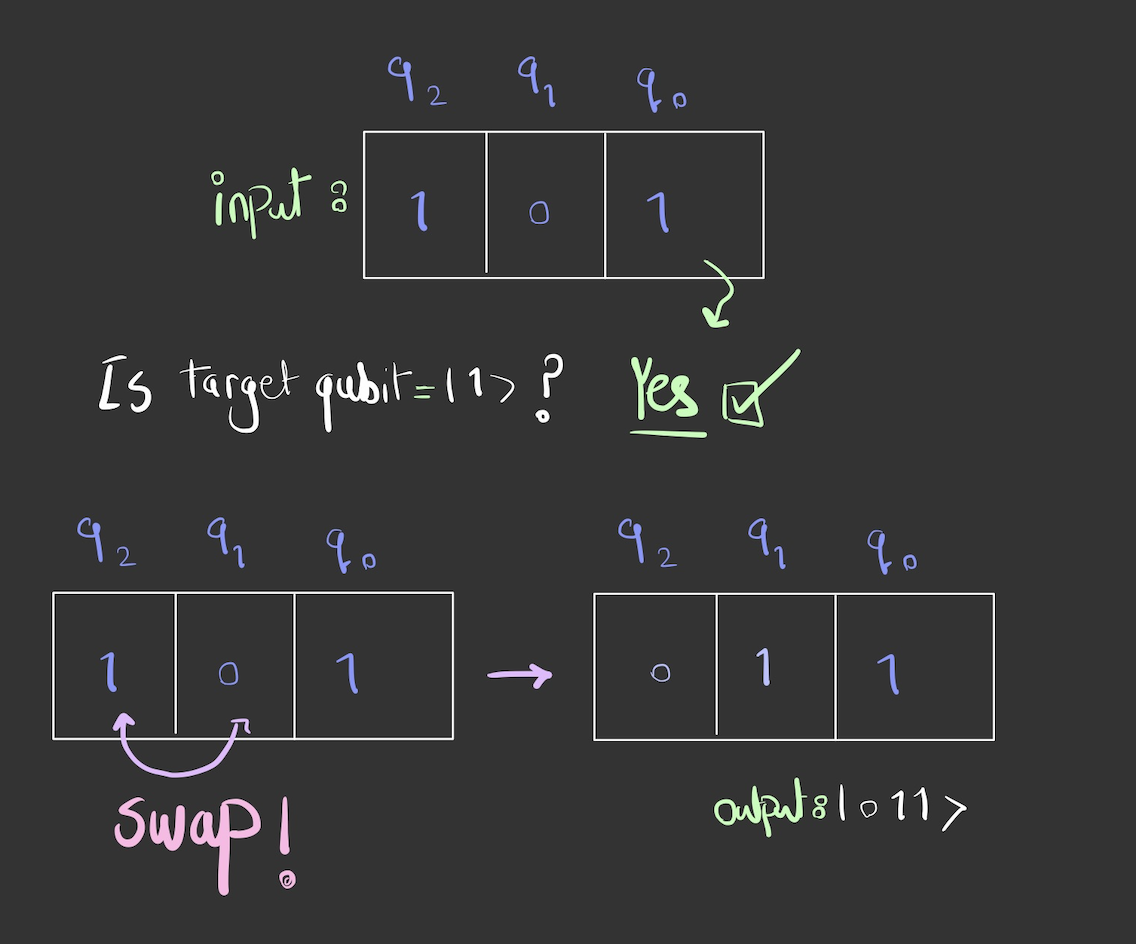
Since the control qubit
Now, let's go through the code and see whether you get the correct answer or not.
Step 1:
circuit.cx(1, 2)
The CX gate with control qubit
Since the control qubit is not
Before the cx gate:
After the cx gate:
Step 2
circuit.ccx(0, 2, 1)
The Toffoli gate with control qubits
In this case, both
Before the ccx gate:
After the ccx gate:
Step 3
circuit.cx(0, 2)
In this step, you're performing a CX Gate on
Since
Before the cx gate:
After the cx gate:
So, the final state becomes
Your code works!
Now, you can go ahead and measure your circuit.
qc.measure(q,c)
job = AerSimulator().run(qc,shots=1000)
counts = job.result().get_counts(qc)
print(counts)
print(qc.draw())
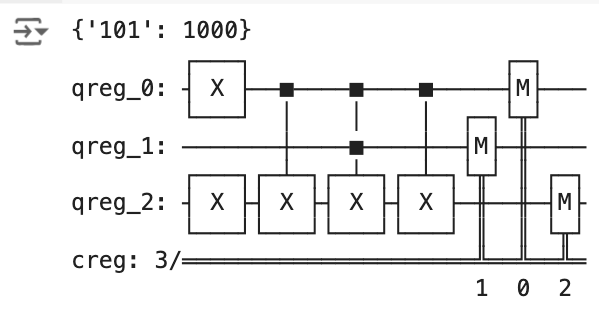
When you run everything together, you'll get something like this:
Implementing Qiskit's Built-in Fredkin Gate
Qiskit has made it easy!
You can simply import CSwapGate from Qiskit's library and bam!
Here is a complete example:
from qiskit import QuantumCircuit, QuantumRegister, ClassicalRegister

from qiskit.circuit.library import CSwapGate

q = QuantumRegister(3, "qreg")
c = ClassicalRegister(3, "creg")
qc = QuantumCircuit(q, c)

qc.x(q[0])
qc.x(q[2])

qc.append(CSwapGate(), [q[0], q[1], q[2]])

qc.measure(q, c)

job = AerSimulator().run(qc,shots=1000)

counts = job.result().get_counts(qc)

print(qc.draw())

print(counts)
After you run this cell, you'll unsurprisingly get the same result as before:
Wanna get notified when I add new blog posts?
Drop your email / discord id here